Getting Started - Deploying your first service
Phoesion Glow is a complete cloud micro-service development solution.
Now that you have all the required components setup and running, it's time to build and deploy your first cloud service.
Prerequisites
- Windows 10
- Phoesion Glow Entities Installed and Running (see previous guide)
- Phoesion Glow Blaze for Windows
1. Download the sample
This a simple 'Hello World' sample service binaries, designed to demonstrate the basics of a micro-service.
Download the Hello world sample binaries from here and unzip it.
2. Connect to Phoesion Glow Lighthouse
Run Phoesion Glow Blaze app.
You must already have your connection profile setup from the previous step.
Click on the connection profile from the main window in Phoesion Glow Blaze to connect to the Lighthouse instance that is running on your server.
Note
If you do not have a connection profile, see the Create a Lighthouse connection profile section from the previous guide.
3. Create a new Quantum Space
Your cloud can run more than one set of services.
Think of a Quantum Space as an isolated box that contains a set of micro-services and spans across your cloud servers.
For more in-depth info you can read about Quantum Spaces here.
3.1 Create a new Quantum Space

3.2 Setup new Quantum Space
We will create a new quantum space named 'Testing' and we will bind the domain 'localhost' (since we are testing on the local machine) to it.
(if 'localhost' is used by another qSpace, you can use 127.0.0.2 (see notes))
Quantum Space Name : Testing
Add Domain
Domain : localhost

Note
Replace [my_domain] with your domain, eg. services.mycompany.com
3.3 Verify and create
Verify the information of your new Quantum Space and click 'Create' to create it.
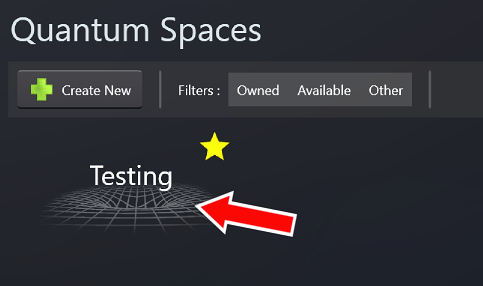
3.4 Open the new Quantum Space
Once the new Quantum Space is created, you will be able to see it in the list. Click on it to open it.
4. Deploy 'Hello World' Sample Services
Now we are ready to deploy the sample in the 'Testing' quantum space.
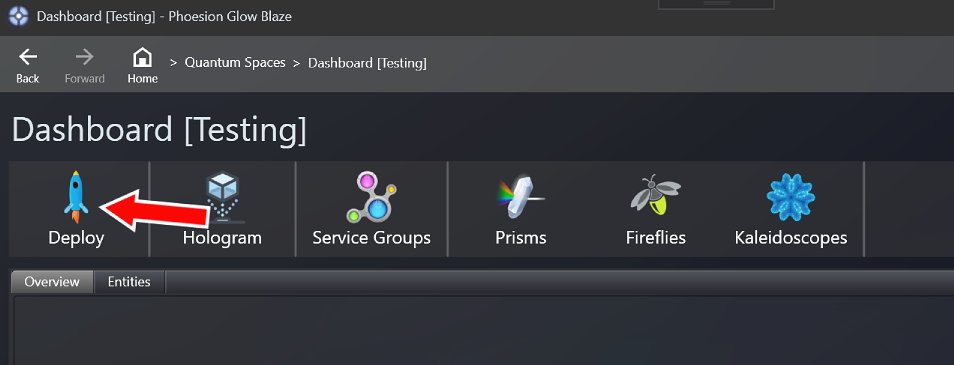
4.1 Start deploy wizard
Click the 'Deploy' button to start the deployment wizard.
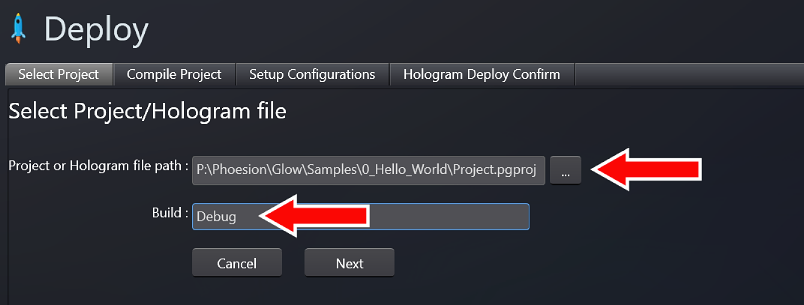
4.2 Start deploy wizard
- For Project select the project.pgproject file from the sample.
- Set the Build to Debug or Release.
- Click 'Next'
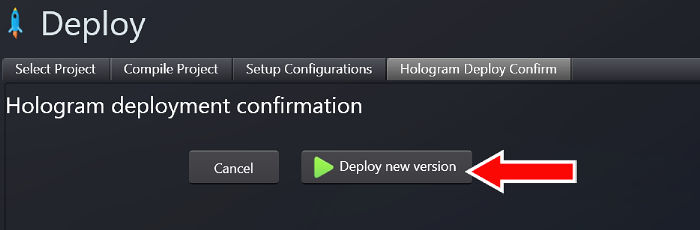
4.3 Deploy services
Once the project is compiled into a hologram, it can be deployed to the Lighthouse.
Click the 'Start Deploy' button to start the deployment.
5. Test your services
To test your services are up and running open a browser and go to one of the following :